I'm trying to be good about working more apples into our diet, so, I've decided to do a week of apple recipes. As the old saying goes ~
An apple a day keeps the doctor away ~ and I'm all for that! Besides, I just so happen to have seven pictures of apple recipes that are waiting patiently for their turn on the blog ~ sounds like serendipity to me!
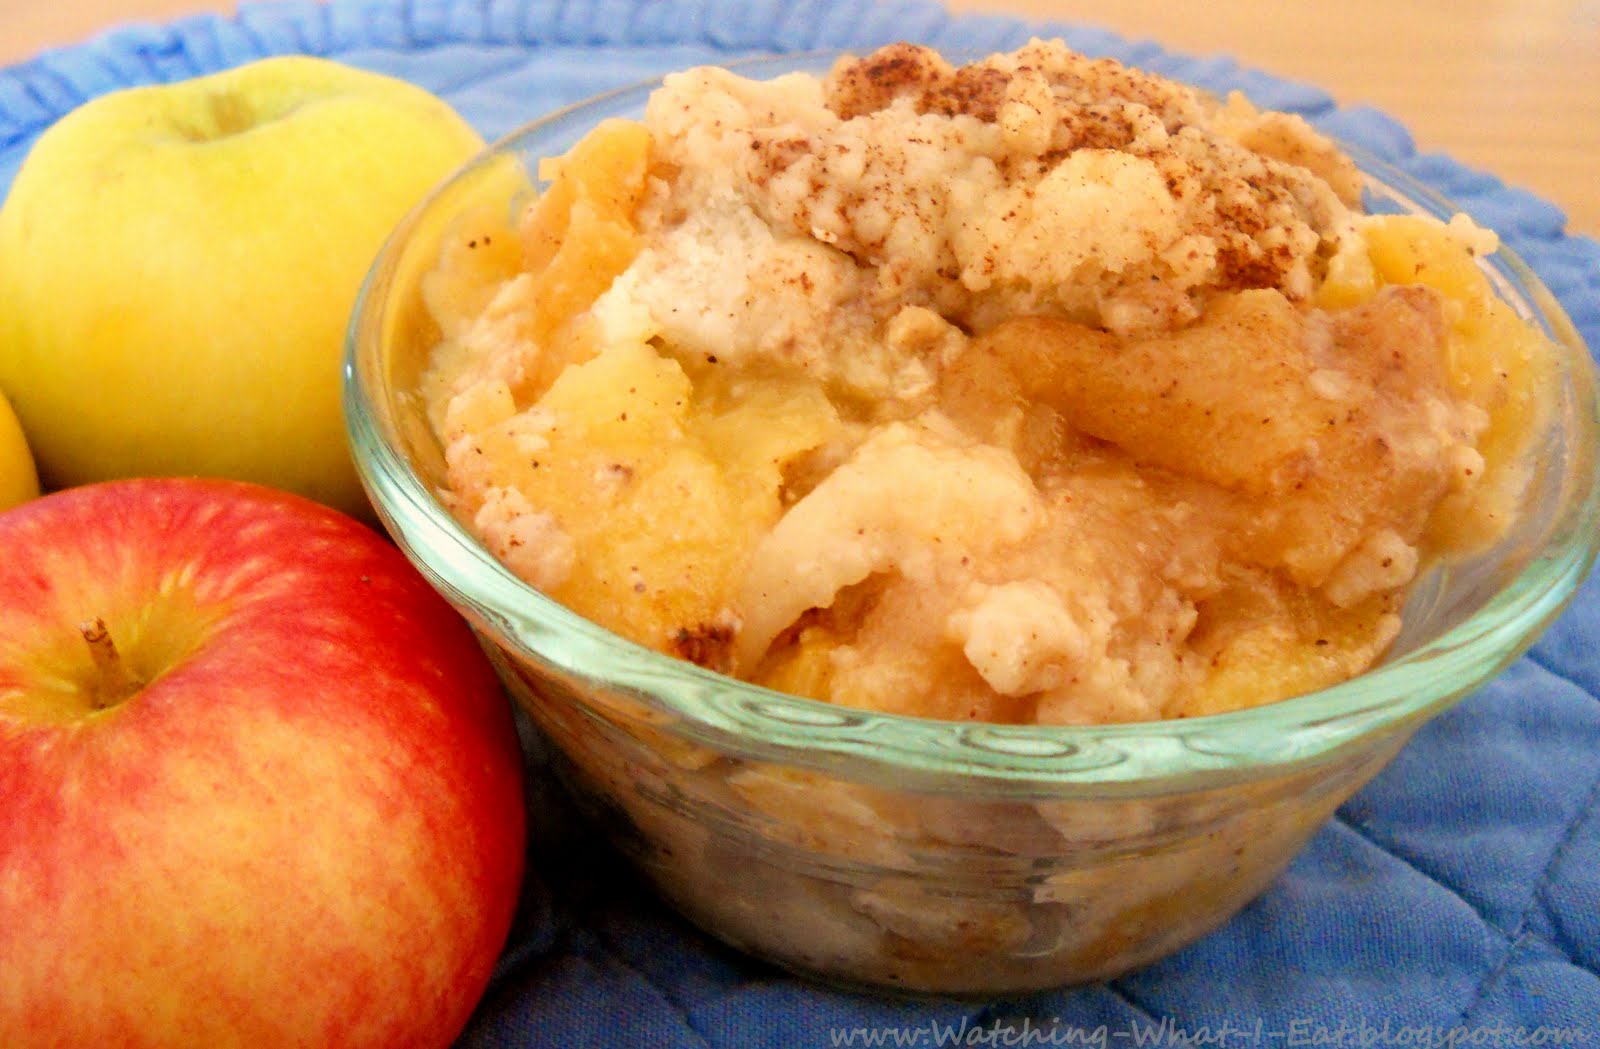
I enjoy making this low calorie, low fat
Baked Breakfast Cinnamon Apple recipe for breakfast, but also for dessert. It tastes so indulgent, but it really isn't. If you haven't tried grating whole nutmeg,
I highly recommend it. Freshly grated nutmeg tastes nothing like the jarred version ~ it's addicting, in a totally good way.
In just about a month we'll be able to start apple picking again. We're lucky enough to have a wonderful apple orchard that's not too far from our house. They have 27 different varieties of apples & over 4,000 apple trees set among acres & acres of orchard to wander through. J & I love to spend the day picking apples, taking a tractor ride around the orchard, enjoying some fresh pressed cider & then having a picnic under the trees. The apple picking starts in early July & goes on through October. We go back every few weeks ~ needless to say, we pick A LOT of apples.
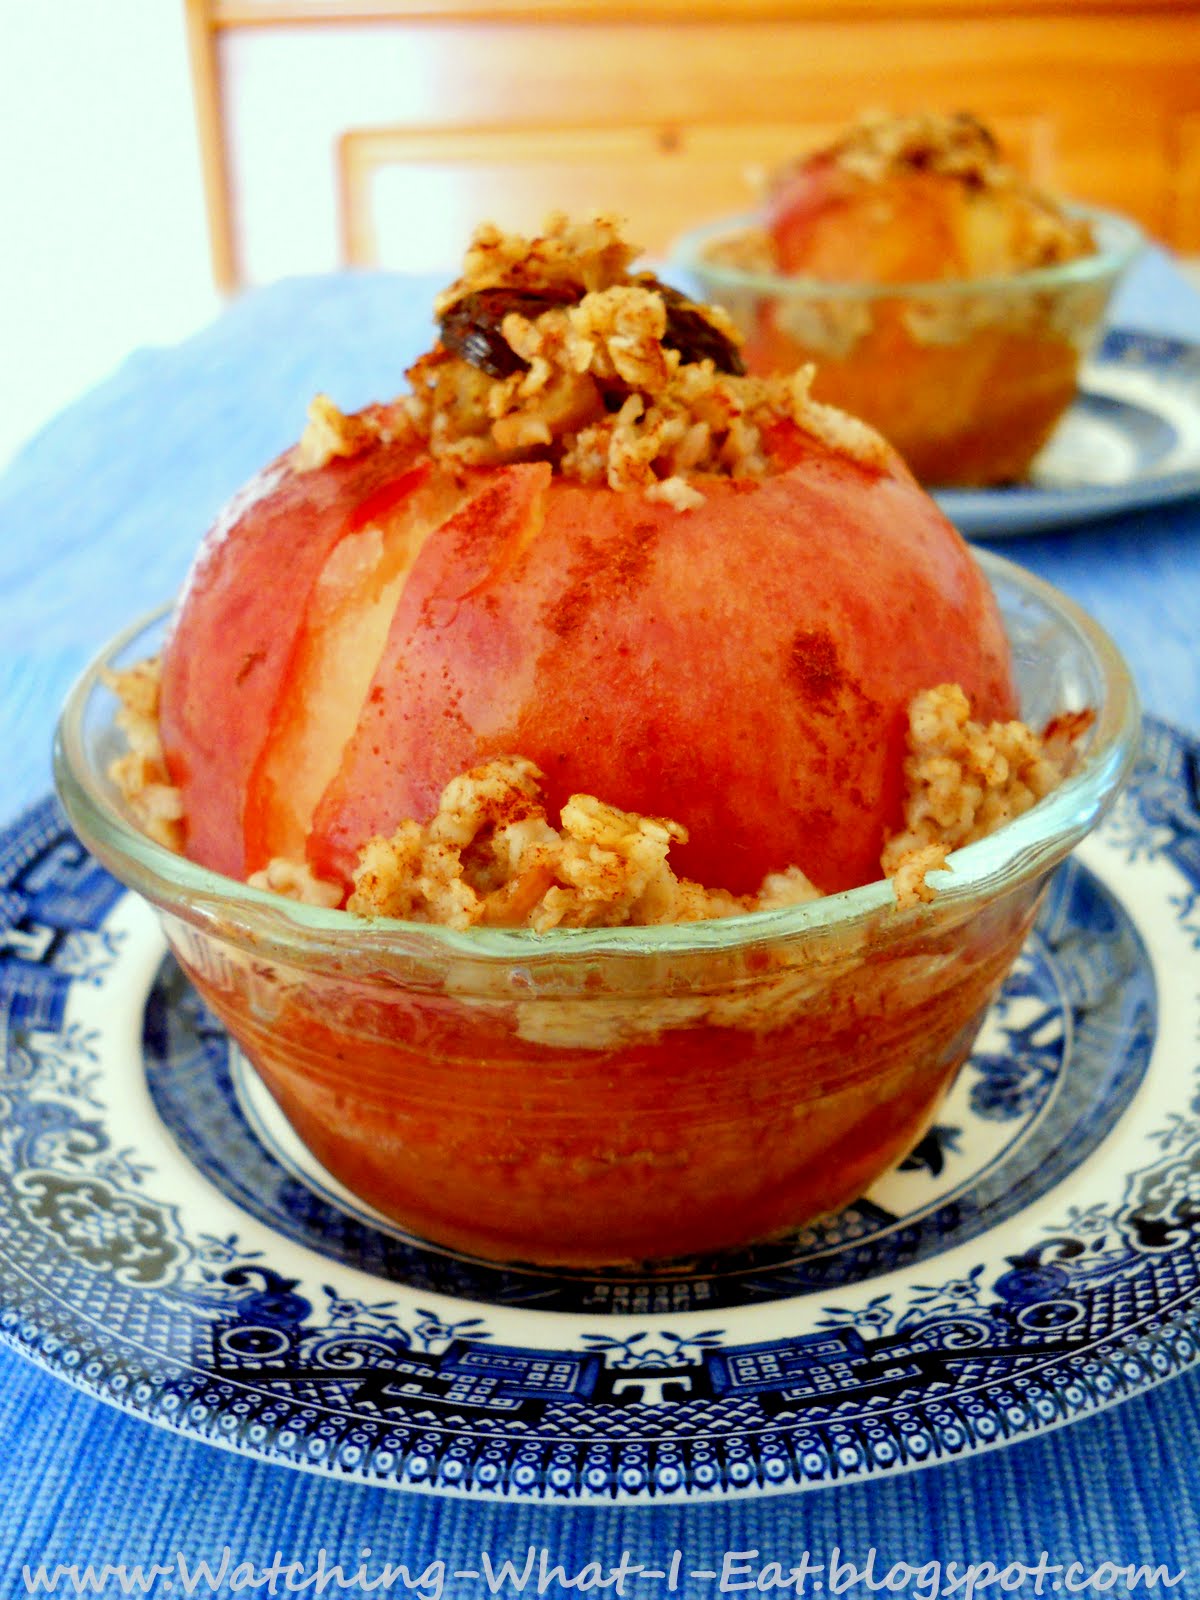
Low-Cal Baked Breakfast Cinnamon Apples with Oatmeal Raisin Crumble
serves 2
- 2 large cored Gala apples (or your favorite baking apple) make sure the center core is big enough to hold the oatmeal crumble
- 1/3 cup quick oatmeal
- 2 Tbsp raisins
- 1 Tbsp chopped walnuts
- 1/2 tsp cinnamon
- 1/8 tsp freshly grated nutmeg
- 1 packet Equal (or sweetener of choice)
- 3 Tbsp maple syrup (or pancake syrup ~ regular or sugar free)
- I Can't Believe It's Not Butter Spray
- extra cinnamon for sprinkling
- Pam cooking spray
Preheat oven to 400 degrees F & coat a small baking dish (or glass Pyrex custard cups if you are using those) with cooking spray.
In a medium bowl, place the oatmeal, raisins, walnuts, cinnamon, nutmeg, Equal & one tablespoon maple syrup ~ mix until well combined. Divide mixture in half.
Place the cored apples in the baking dish & spray the apples, inside & out, lightly with the butter spray.
Spoon the oatmeal crumble mixture into the center of the apples, mounding the top & letting overflow around the apple if necessary.
Spray the apples/crumble all over, once again, with the butter spray & then drizzle the remaining two tablespoon of maple syrup evenly over the apples & crumble. Finish with a light dusting of cinnamon on the apples.
Place stuffed apples in the preheated oven & bake for about 20 minutes or until the apples are cooked through & are tender, but not mushy & the oatmeal crumble is a golden brown.
Serve as is, or like Roy likes it ~ with a little bit of milk poured around the bottom of the apple & a bit of whipped cream.
Enjoy!